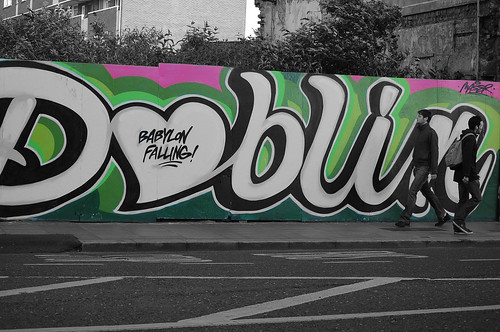
I took this shot near upper camden street, graffiti art done by Maser. You can see the original one here. I decided to try selective coloring on it. Have seen some real good ones on flickr. Trying to avoid photoshop :), I decided to do it in Adobe Lightroom (which btw is a great photo management software, only if it could be free). But after several tries, it didn't seem to work properly. Its very easy to start with, go to Brush tool, make it BnW and then erase the parts you wanna do selective coloring on. But somewhere midway, it seemed to just crash, not exactly crash crash but the eraser tool just won't work right, also cudn't switch between eraser n brush to correct minor details. After 4/5 half tries, time to go back to photoshop. Also was thinking Lightroom might be easier on memory n stuff doing simple selective coloring but no, it took ages n wait'd for seconds (n I'm using latest macbook pro). Photoshop - to my surprise :), lot more easier for selective coloring than lightroom. Import the image, do a background copy of the original layer. From adjustments, selective BnW and then make a mask layer on top of it. Now on the mask layer, just use the brush tool, to erase the parts you are interested in. You can zoom in and do minor details. If an error, switch to black background and erase to get the original parts back. This is important if you want to get the colors right precisely. It was like doing graffiti on original graffiti. The resulting image looked nicer, its bit rought on edges if you see the bigger size of it on flickr, but otherwise looks nice :). Also I only did it using mac trackpad, no mouse.
Sunday, May 10, 2009
Graffiti Selective Coloring
Subscribe to:
Post Comments (Atom)
No comments:
Post a Comment